In this final blog about automatically creating a series of maps in an atlas type program, we will look at adding some text options for the user.
The first option, regarding adding text to a series of maps, is to add a text box so the user can put text on to one or more maps. This could be achieved by adding an additional ribbon tab for adding text to the map. In previous versions of the Atlas program updating the organisation details was an option in which a dialogue box automatically appeared when a new selection was created. Whilst this option enabled updates to occur to organisational data it may be overkill if changes rarely occur. By adding a tab, where this option could be accessed as an when necessary, would therefore be an acceptable alternative. This is option is shown in the graphics below.
The first option, regarding adding text to a series of maps, is to add a text box so the user can put text on to one or more maps. This could be achieved by adding an additional ribbon tab for adding text to the map. In previous versions of the Atlas program updating the organisation details was an option in which a dialogue box automatically appeared when a new selection was created. Whilst this option enabled updates to occur to organisational data it may be overkill if changes rarely occur. By adding a tab, where this option could be accessed as an when necessary, would therefore be an acceptable alternative. This is option is shown in the graphics below.
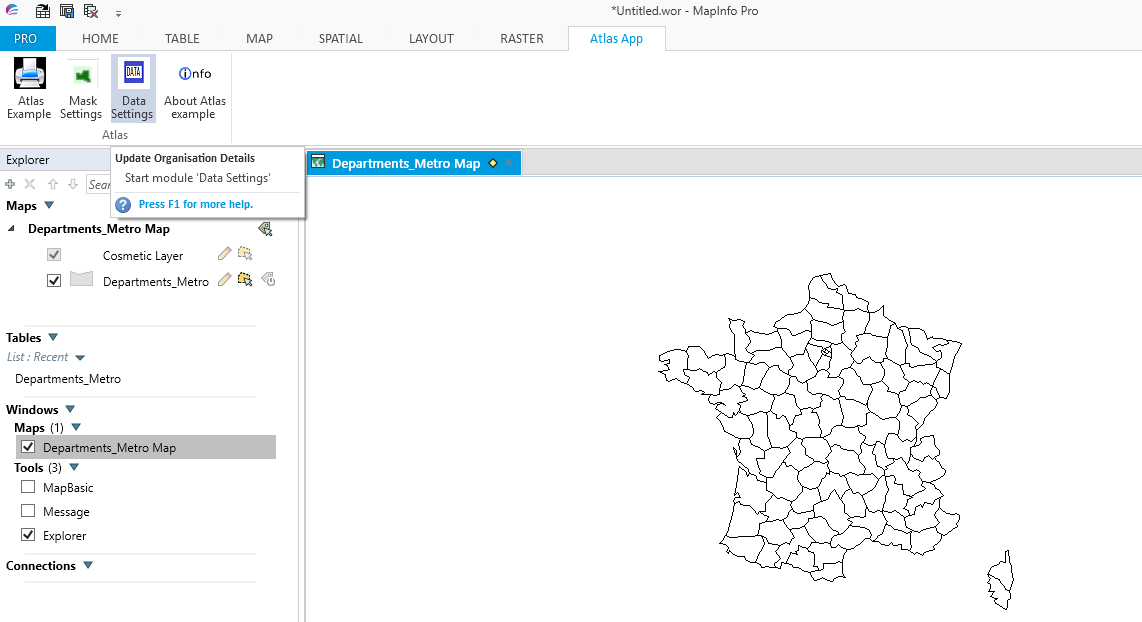
When the Data option is selected the dialogue box appears with an additional option of a text box for inputting additional information in the map.
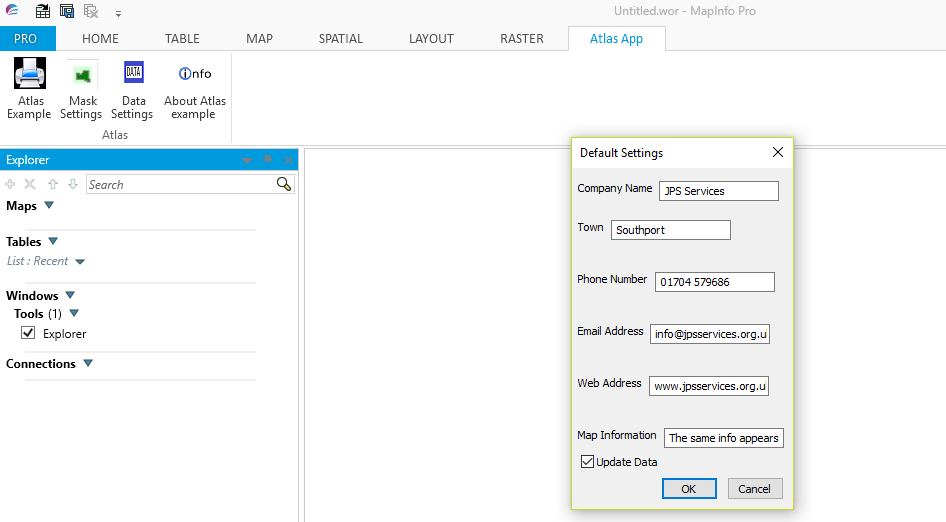
This text box could be used to input text relevant to all the maps in a series. However, this option would not be suitable for customised statements which would be relevant to individual maps. For this option you will need to add MapBasic code into the Atlas program. This option would be appropriate if you have data in your tables which you would like to display in your map series. We can achieve this by updating the code in the LayoutPortrait and LayoutLandscape modules.
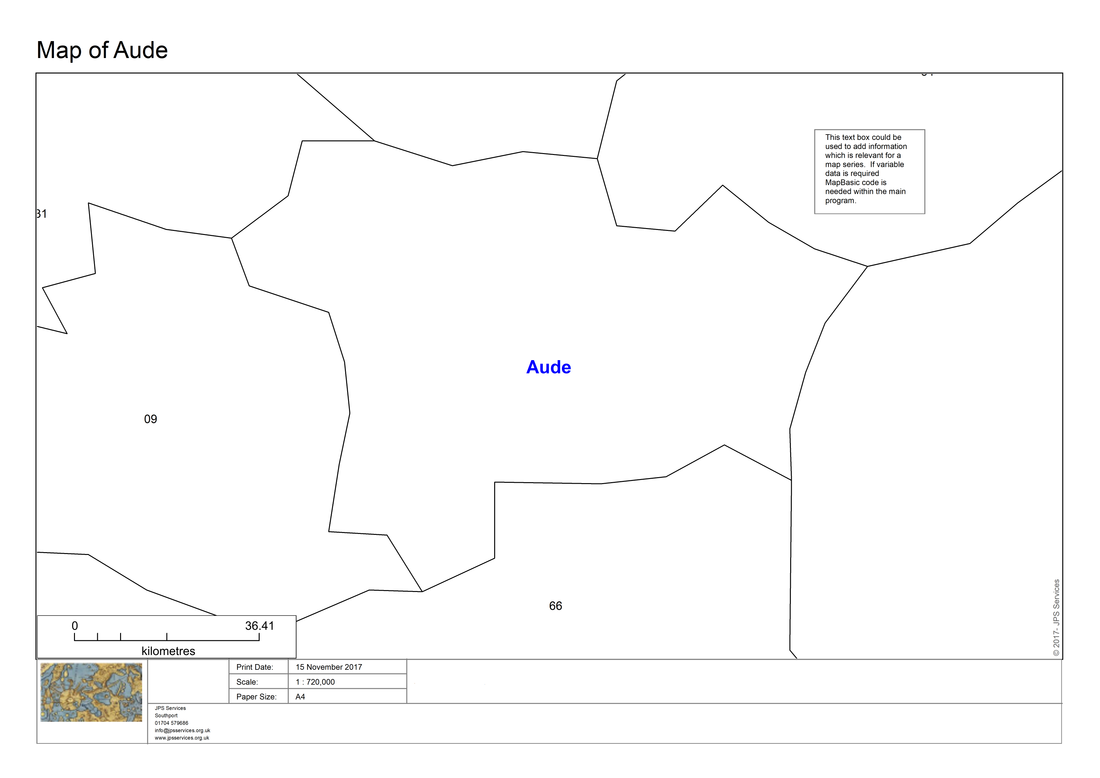
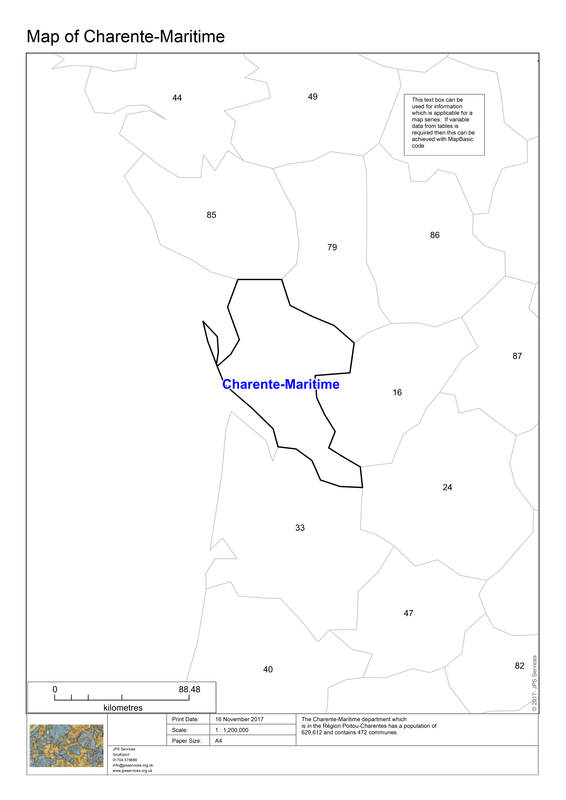
Here is the result of some standard text included within a section from the map of French departments. This French departmental map was used in the original version of the program called PrintLayout developed by Egge-Jan Pollé.
Here is the result of some standard text included within a section from the map of French departments. This French departmental map was used in the original version of the program called PrintLayout developed by Egge-Jan Pollé.
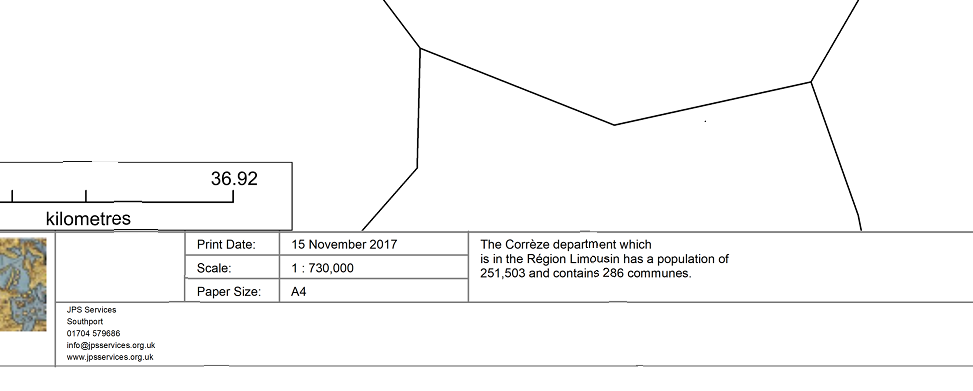
We could also add some text into a map series which contains variable data by creating code with MapBasic. Here is an example using data from the map's browser.
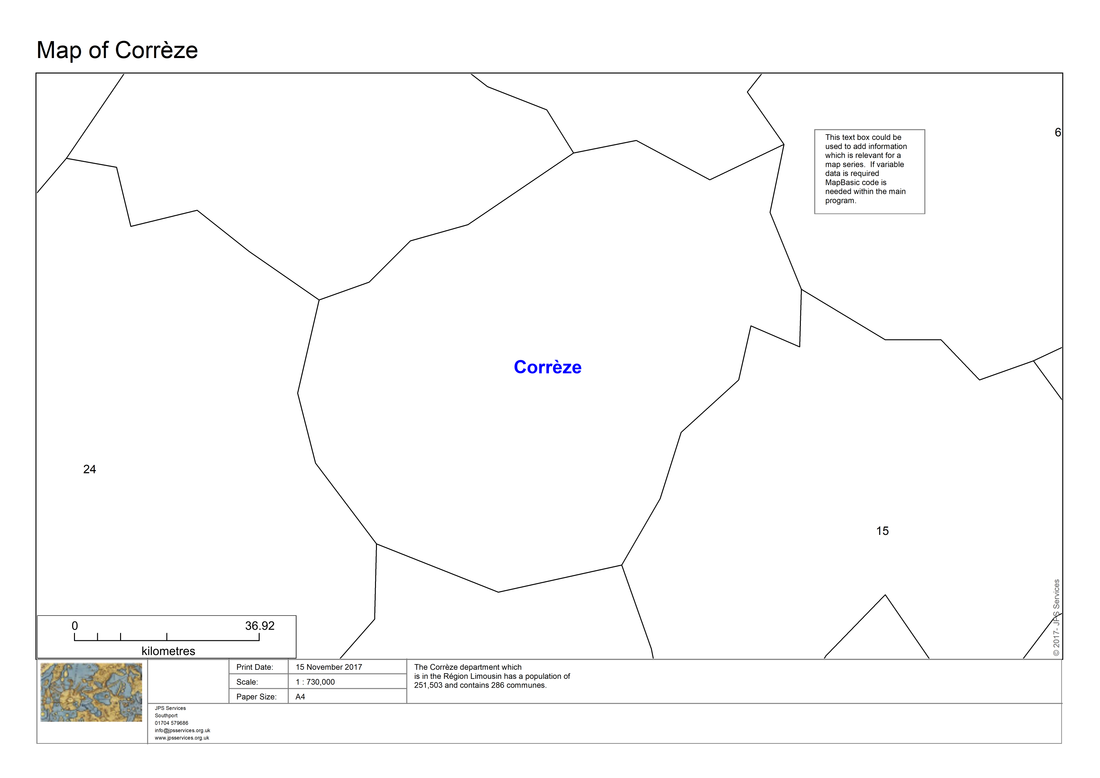
Here is a close up of the variable text.
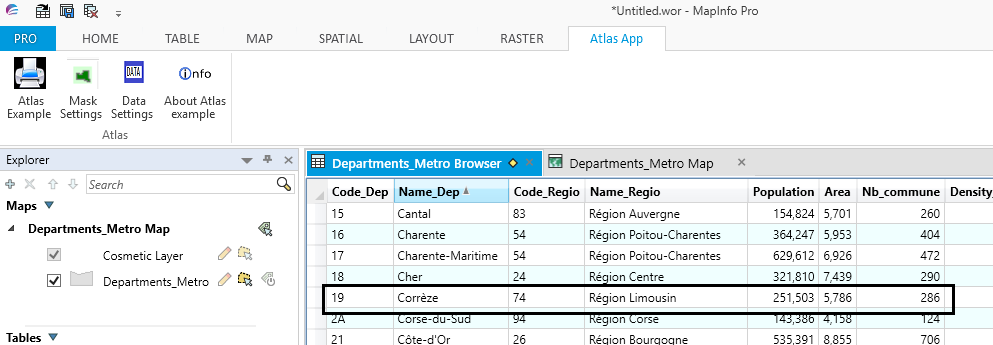
Here is the browser data from which this information is derived.
These modifications to the Atlas program involved updating a number of modules. The first module updated was the Atlas.def definition file. Here are the additional global variables used within the French Departments map:-
Global my_table_col_dep, my_table_col_reg As String
Global my_table_col_pop, my_table_col_com As Integer
Global table_col_dep, table_col_reg, table_col_pop, table_col_com as Alias
Next the AtlasRibbonInterface module was updated by adding the Data tab code. Here is the relevant code snippet:-
ReDim marrModProgramsNames(3)
ReDim marrModProgramsImages(3)
marrModProgramsNames(3) = "Data Settings"
marrModProgramsImages(3) = ApplicationDirectory$() + "\Images\Data.png"
nCtrlIdx = RBNGroupAddButton("OrganisationData", marrModProgramsNames(3),"",sTabName,sGroupName)
If nCtrlIdx > 0 Then
' Create and set the button tooltip
Call RBNControlSetToolTipIdx(nCtrlIdx,"Update Organisation Details","Start module '" + marrModProgramsNames(3)+ "'","")
' Set the button icon
Call RBNControlSetIconsIdx(nCtrlIdx,CONTROL_SIZE_LARGE,"",marrModProgramsImages(3))
' Set Custom MapBasic handle to the button
Call RBNControlSetCustomMBXHandlerIdx(nCtrlIdx,"InputAtlasDefaultSettings")
End If
ReDim marrModProgramsNames(4)
ReDim marrModProgramsImages(4)
marrModProgramsNames(4) = "About Atlas example"
marrModProgramsImages(4) = ApplicationDirectory$() + "\Images\Info.png"
nCtrlIdx = RBNGroupAddButton("AboutAtlasExample", marrModProgramsNames(4),"",sTabName,sGroupName)
If nCtrlIdx > 0 Then
' Create and set the button tooltip
Call RBNControlSetToolTipIdx(nCtrlIdx,"Modular Programming Example App","Start module '" + marrModProgramsNames(4)+ "'","")
' Set the button icon
Call RBNControlSetIconsIdx(nCtrlIdx,CONTROL_SIZE_LARGE,"",marrModProgramsImages(4))
' Set Custom MapBasic handle to the button
Call RBNControlSetCustomMBXHandlerIdx(nCtrlIdx,"AtlasAbout")
End If
The Data tab calls the InputAtlasDefaultSettings module. Here is the updated part of the code:-
Control StaticText
Title "Map Information" Position 1dW, 20dH
Control EditText
Value sData ' Add sData to def file
Into sData
ID 6
Control CheckBox
Title "Update Data"
Into l_update_data 'Add l_update_data to def file
Control OKButton
Control CancelButton
If CommandInfo(CMD_INFO_DLG_OK) Then
' ...then the user clicked OK, and the variable
' contains the text the user entered.
End If
sPrintDate = CurDate()
sPrintDate = RegionalLongDate(sPrintDate)
sFont = "Arial"
sCopyrightText = Chr$(169) + Chr$(32) + Year(CurDate()) + "- " + sAddressArray(1)
Exit Sub
If the user has entered text in the Data Input text box then a rectangle is created and the text is displayed.
Here is the code added to the LayoutPortrait module to achieve this:-
'**************************************************************************
' Create a box to contain text input by the user
'**************************************************************************
If Len(sData) > 1 Then
Create Rect (150*fMp,35*fMp) (180*fMp,58*fMp)
Pen (1,2,8421504)
Brush (1,16777215,16777215)
End If
'**************************************************************************
' If there is text entered then put it in the defined rectangle
'**************************************************************************
If Len(sData) > 1 Then
Create Text
sData
(153*fMp,36*fMp) (177*fMp,57*fMp)
Font MakeFont(sFont,0,iLayoutFontSize1,BLACK,WHITE)
End If
'**************************************************************************
To put variable data into the map series we use the Alias variable. For more information about the Alias variable please look in the MapBasic User Guide.
'**************************************************************************
' Add some variable data into the map
'**************************************************************************
If sTable = "Departments_Metro" Then
Create Text
"The " + my_table_col_dep + " department which "
+ Chr$(10) + "is in the "
+ my_table_col_reg + "has a population of " + Chr$(10)+
Format$( my_table_col_pop,",#")
+ " and contains " + my_table_col_com + " communes."
(112*fMp,266*fMp) (300*fMp,274*fMp)
Font MakeFont(sFont,0,iLayoutFontSize1,BLACK,WHITE)
End If
Similar code was added to the LayoutLandscape module.
Next we update the CreateMaskMaps module to include the variables needed for the above code to work. Here is the relevant code snippet:-
Map From RegionSelected
'**********************************************************************************
' Here we initialise the variables for the map series
'**********************************************************************************
table_col_dep = RegionSelected + ".Name_Dep"
my_table_col_dep = table_col_dep
table_col_reg = RegionSelected + ".Name_Regio"
my_table_col_reg = table_col_reg
table_col_pop = RegionSelected + ".Population"'
my_table_col_pop = table_col_pop
table_col_com = RegionSelected + ".Nb_commune"
my_table_col_com = table_col_com
'****************************************************************************************
At the end of CreateMaskMaps module we need to ensure that the sMaskTable code is only used if the user has selected the mask option. The following code updates this module to ensure that the correct procedures take place dependent on the user's actions.
Close Window iLayoutWindowID
Close Window iMapWindowID
'Close Table My_own_company_logo ** No longer needed see previous blog for explanation
Close Table RegionSelected
If l_create_mask Then
Close Table sMaskTable
End If
Set Map Redraw On
Set Window FrontWindow() Enhanced On
Exit Sub
'---------------------------
ErrorHandler:
'Note Error$()
End Sub CreateMaskMaps
The Atlas program now offers the user the option of customising a map series with relevant data derived from the browser data.
Here are some samples from the original French Departments map.
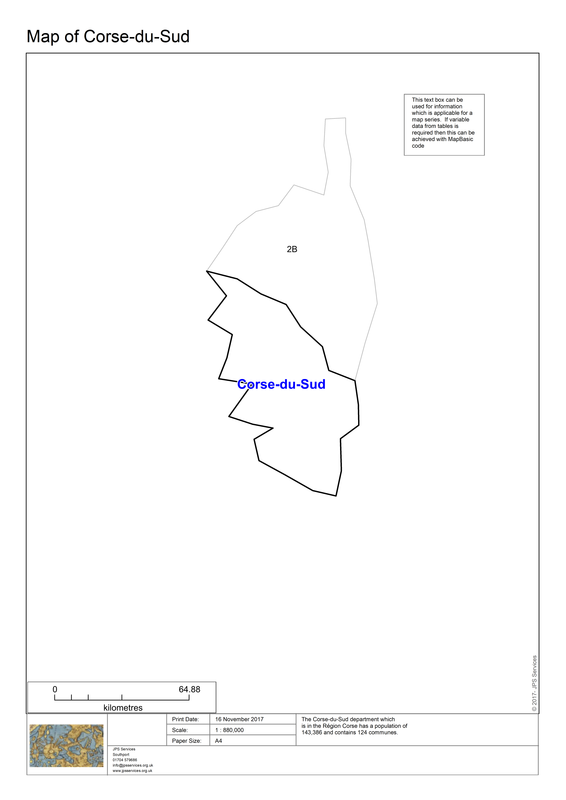
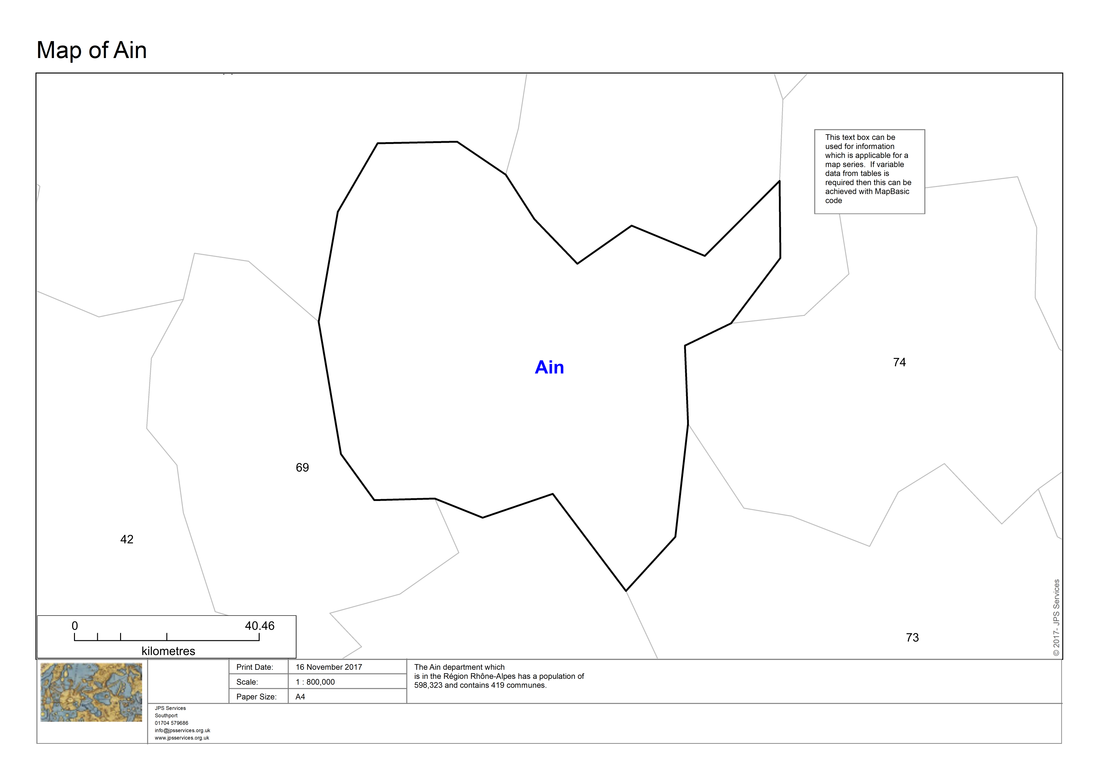
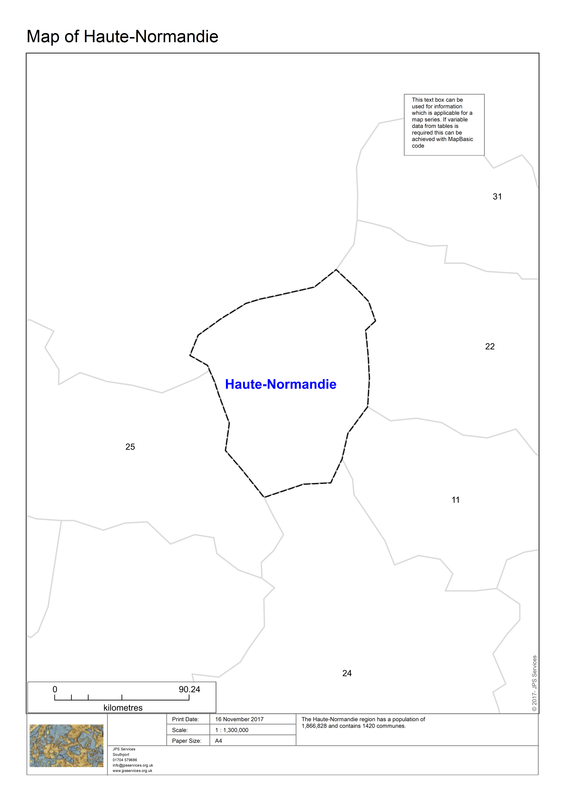
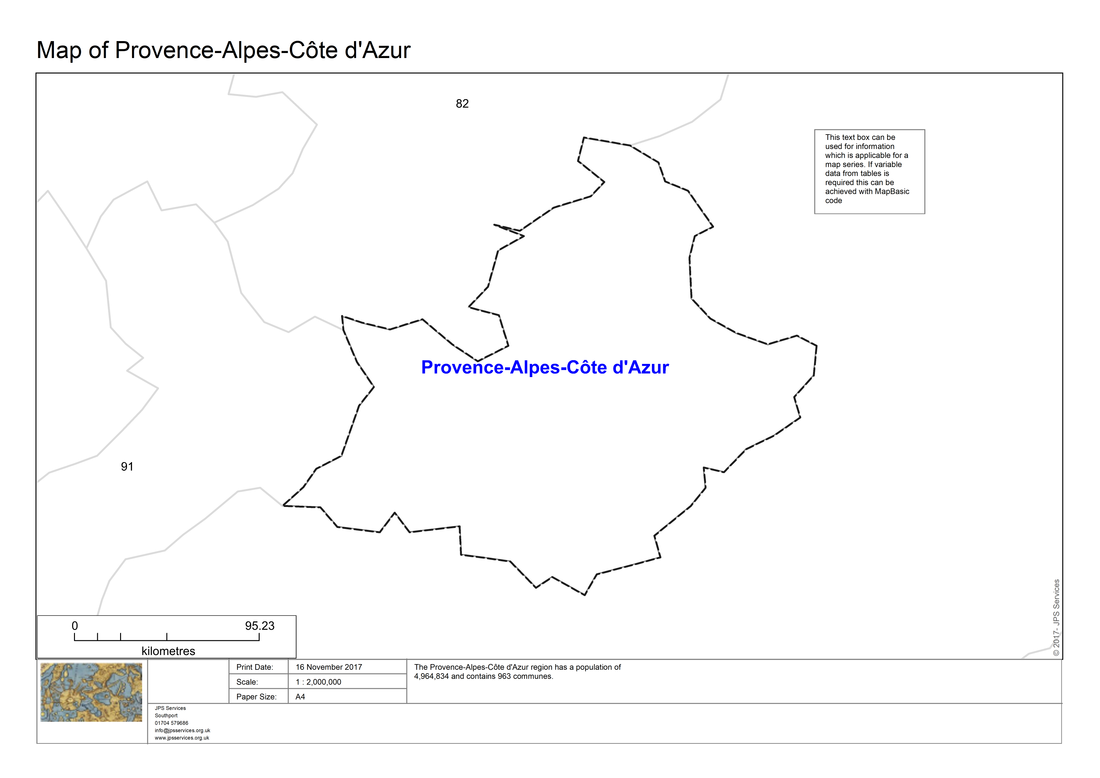
We can adjust the code within the LayoutPortrait and LayoutLandscape modules so that we can create maps from a regional map of France. Here are a few examples which also make use of the mask option:-
Using MapBasic code it is possible to create a series of maps on a regular basis in the knowledge that any changes in table data will be automatically reflected in the individual maps. Mistakes, which can occur in the map creation process, are minimised by using an application such as the Atlas program. The whole process being automated by using MapBasic code also ensures significant time savings in map production.
 RSS Feed