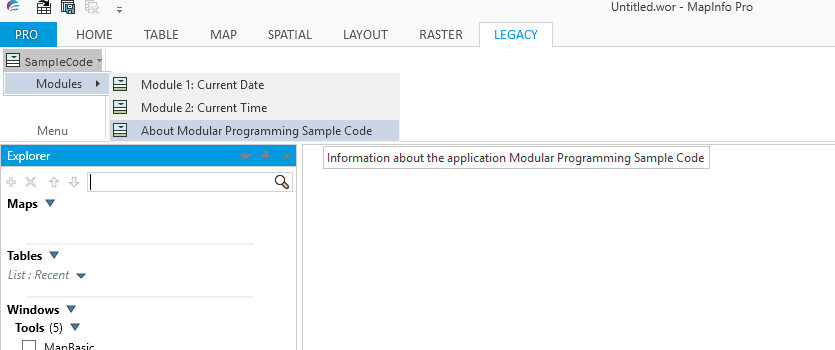
If you run any menu based MapBasic code in the latest version of MapInfo Pro it should still be available to use. The code is converted to accommodate the new ribbon interface. In this case your code will create a Legacy tab automatically as seen in the example below.
In many cases this is sufficient for the user and perhaps updating the code is not necessary. However, if the code does need to be updated then the process is not altogether a difficult task. All of the steps have been clearly explained by Peter Horsboll Moller in his slide presentations. Using the steps outlined in these presentations you could modify existing menu based code to a ribbon based solution.
To use the ribbon based interface used in the slide presentation examples, you also need some understanding of modular programming. Again this has been fully explained by Egg-Jan Polle in his pdf Modular Programming in MapBasic. As the example code for Modular Programming in MapBasic uses the menu based version of MapInfo Pro we could modify the User Interface Module: ProjectUI.mb. This module contains menu based code and can be used to demonstrate how to update existing code to a ribbon based interface. One of the advantages of modular code is that only those modules requiring changes need to be modified. All the other modules can be linked again to form the executable without further work or need for compiling of these modules.
To use the ribbon based interface used in the slide presentation examples, you also need some understanding of modular programming. Again this has been fully explained by Egg-Jan Polle in his pdf Modular Programming in MapBasic. As the example code for Modular Programming in MapBasic uses the menu based version of MapInfo Pro we could modify the User Interface Module: ProjectUI.mb. This module contains menu based code and can be used to demonstrate how to update existing code to a ribbon based interface. One of the advantages of modular code is that only those modules requiring changes need to be modified. All the other modules can be linked again to form the executable without further work or need for compiling of these modules.
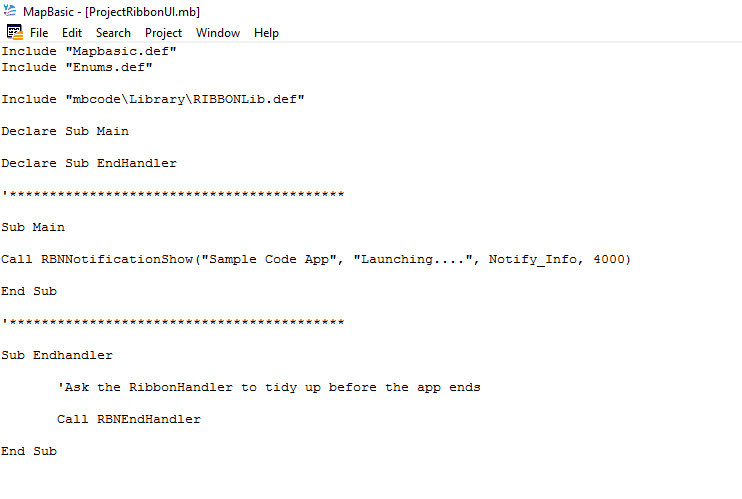
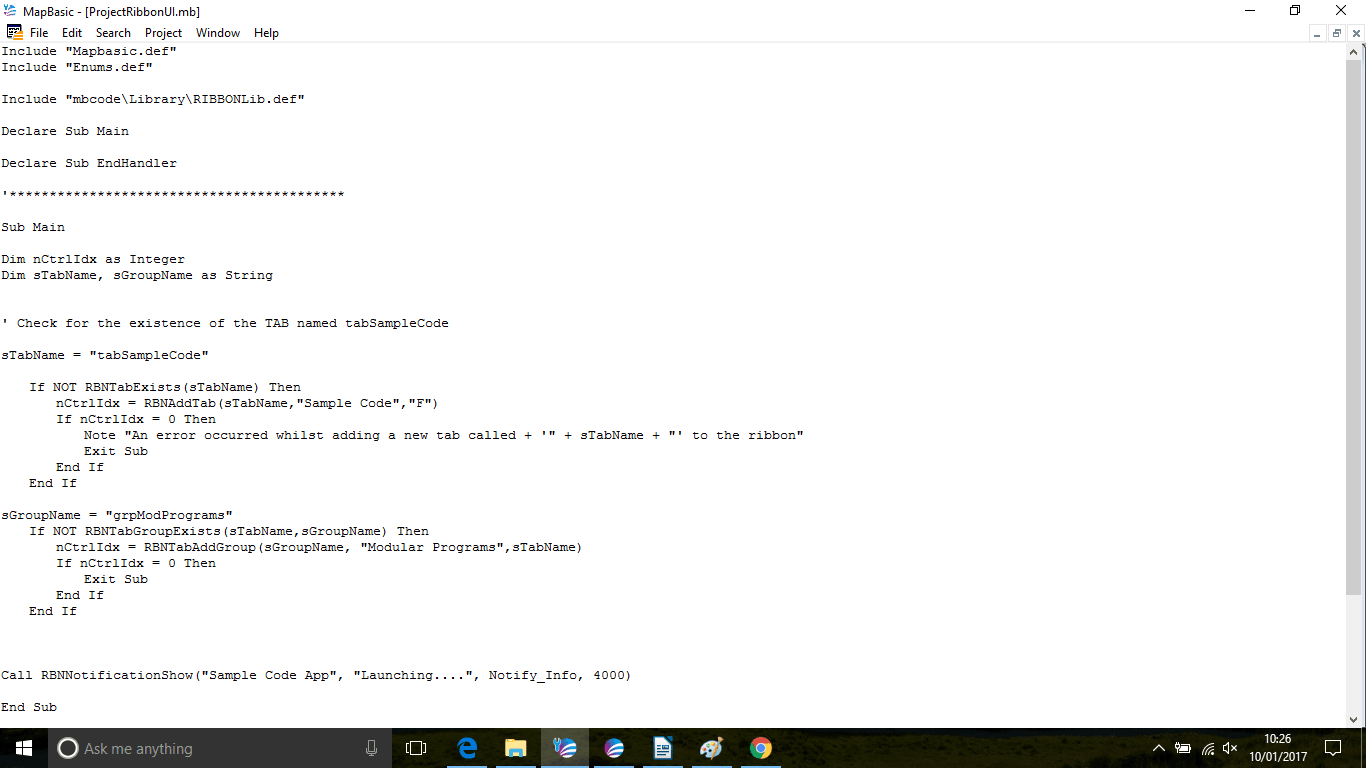
Using the slide presentation we can create the appropriate file structures to create the revised version of this modular programming application. Below is the first stage in the process:-
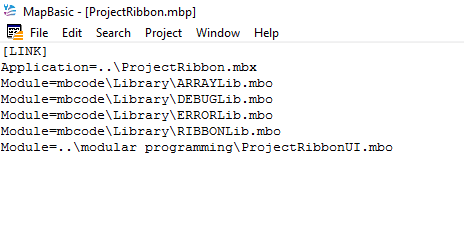
Once you have created the above code and have compiled it into an MBO you can create a project file as in the following example:-
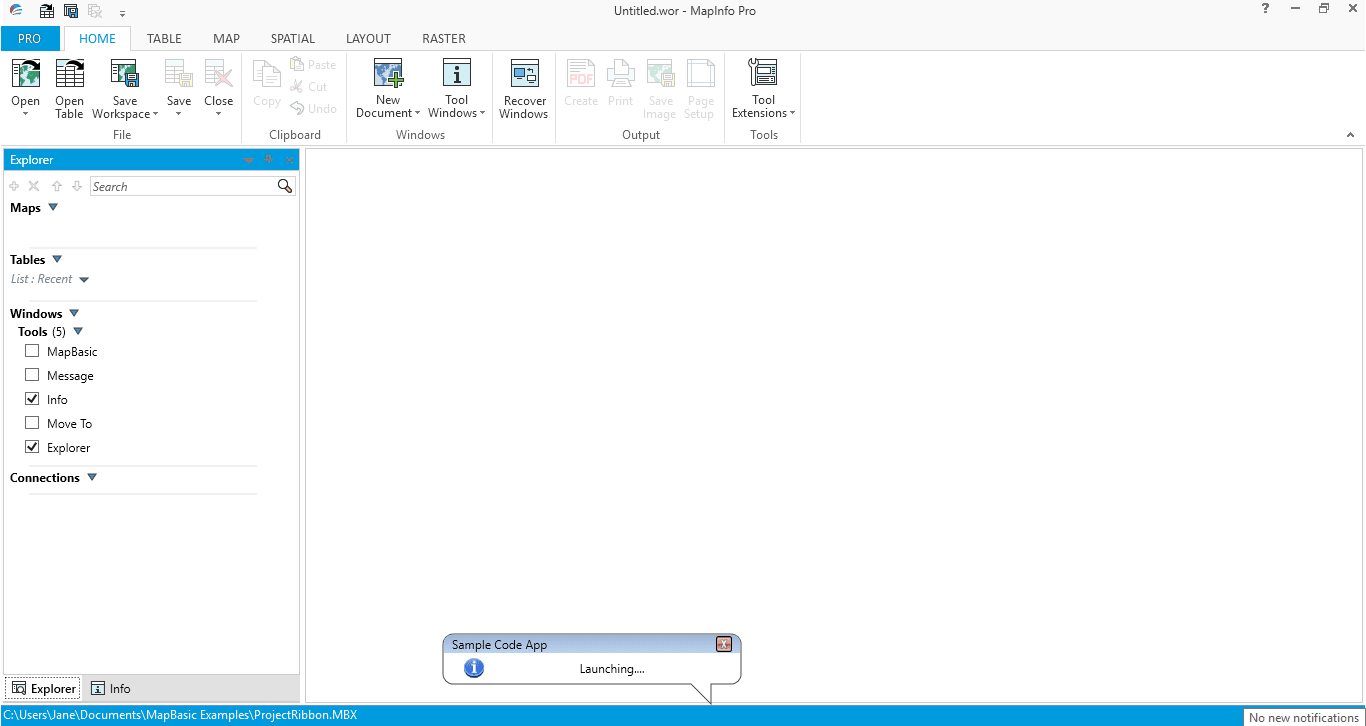
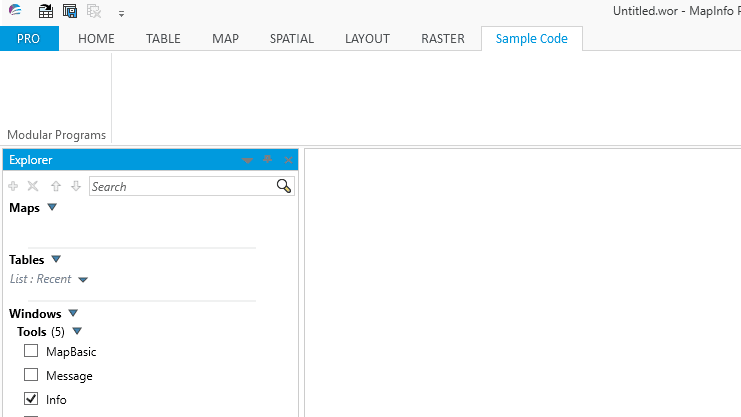
Now after linking this file you can run the ProjectRibbon.mbx which will produce the following result in MapInfo Pro:-
So far we have created some code which runs in MapBasic Pro but as yet we do not have a Tab or Group element in our code. This is the next stage of the process as shown in the following code:-
Here we have created a new Tab and Group for the user interface MBO part of our code. When this code is compiled and linked we can run it in MapInfo with the following results:-
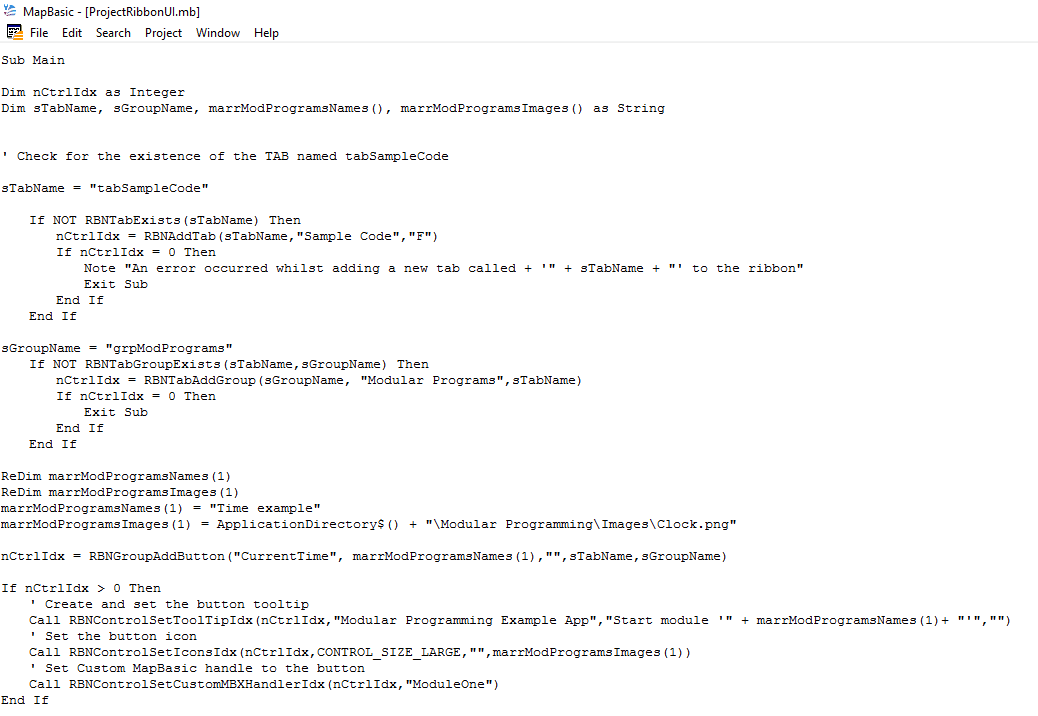
At this stage we need to add the relevant buttons to enable the user to access the features of the code. This is demonstrated in the following code snippet:-
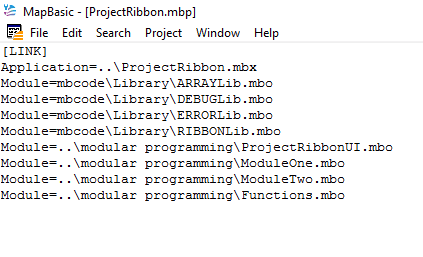
Next we need to update the MBP file to include those modules we intend to access. As shown in the following image:-
The above code snippets, when compiled and linked, will create a button with an image of a clock in MapInfo to reflect the fact that this is module gives us the current time.
When you create custom code you will either have to create images or download them from the web. The presentation by Peter Hors Boller, mentioned earlier, includes the various options regarding images including using one of the numerous icons available within MapInfo Pro. In this coding example some free images for the time, date and about buttons were downloaded from the web. These images were then resized to 32x32 pixels using the Paint program.The above code snippets, when compiled and linked, will create a button with an image of a clock in MapInfo to reflect the fact that this module gives us the current time.
When you create custom code you will either have to create images or download them from the web. The presentation by Peter Hors Boller, mentioned earlier, includes the various options regarding images including using one of the numerous icons available within MapInfo Pro. In this coding example some free images for the time, date and about buttons were downloaded from the web. These images were then resized to 32x32 pixels using the Paint program.The above code snippets, when compiled and linked, will create a button with an image of a clock in MapInfo to reflect the fact that this module gives us the current time.
If the clock button is pressed the time module is called as shown below:-
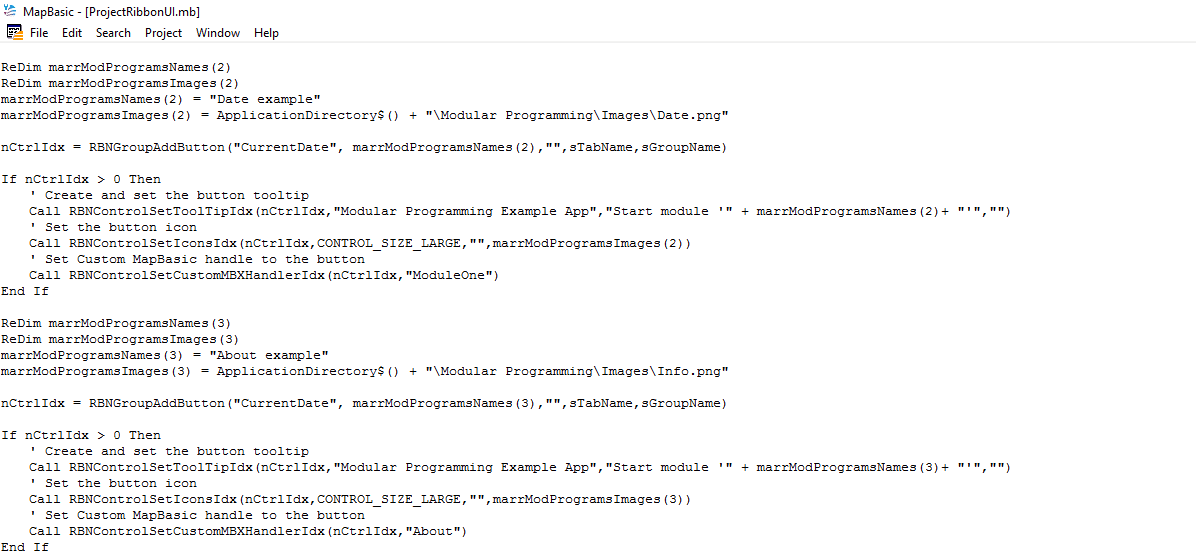
The next stage is to create icons for the other two modules. We can do this by copying the appropriate code that we used to create the first icon and then updating the information. Normally, I would not recommend just copying code. There is a school of thought which believes that the learning process is enhanced when you actually type code rather than just cutting and pasting. However, on this occasion the copying process is acceptable as it will ensure that errors are minimised when creating the next two buttons for our ribbon based app.
Here is the updated code:-
Here is the updated code:-
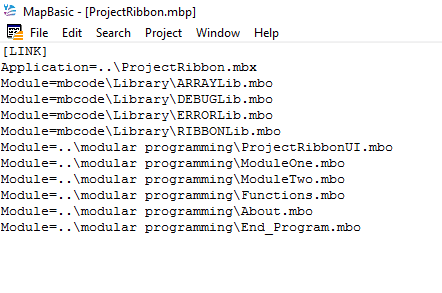
As well as updating this section of code we also need to make other changes to get the app to run successfully. The About and End_Program sections of code have been put into separate modules and therefore have also been added the ProjectRibbon.mbp.
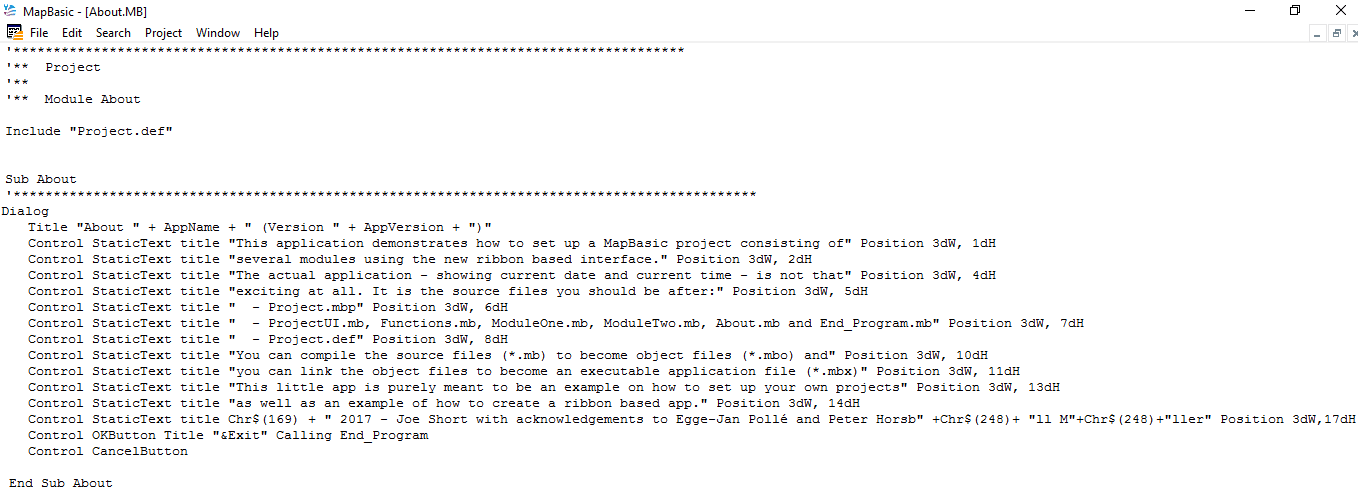
Here is the code for the About module:-
Here is the code for the About module:-
Here is the code for the End_Program module:-
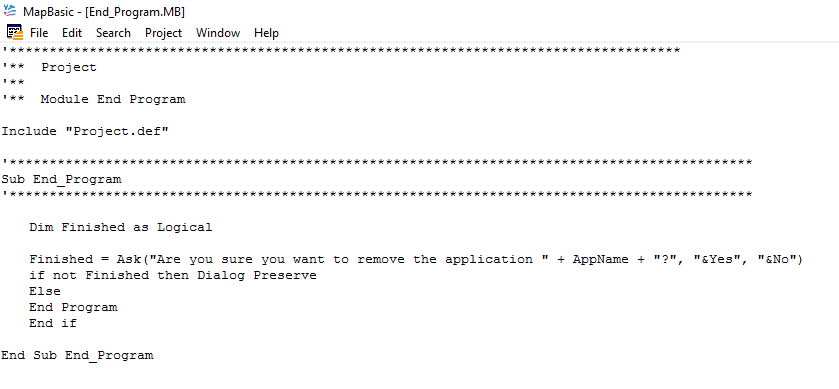
Finally, here is the code for the ProjectRibbon.mbp:-
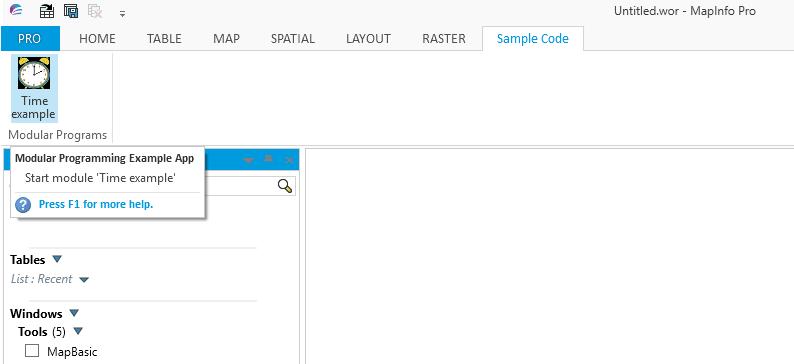
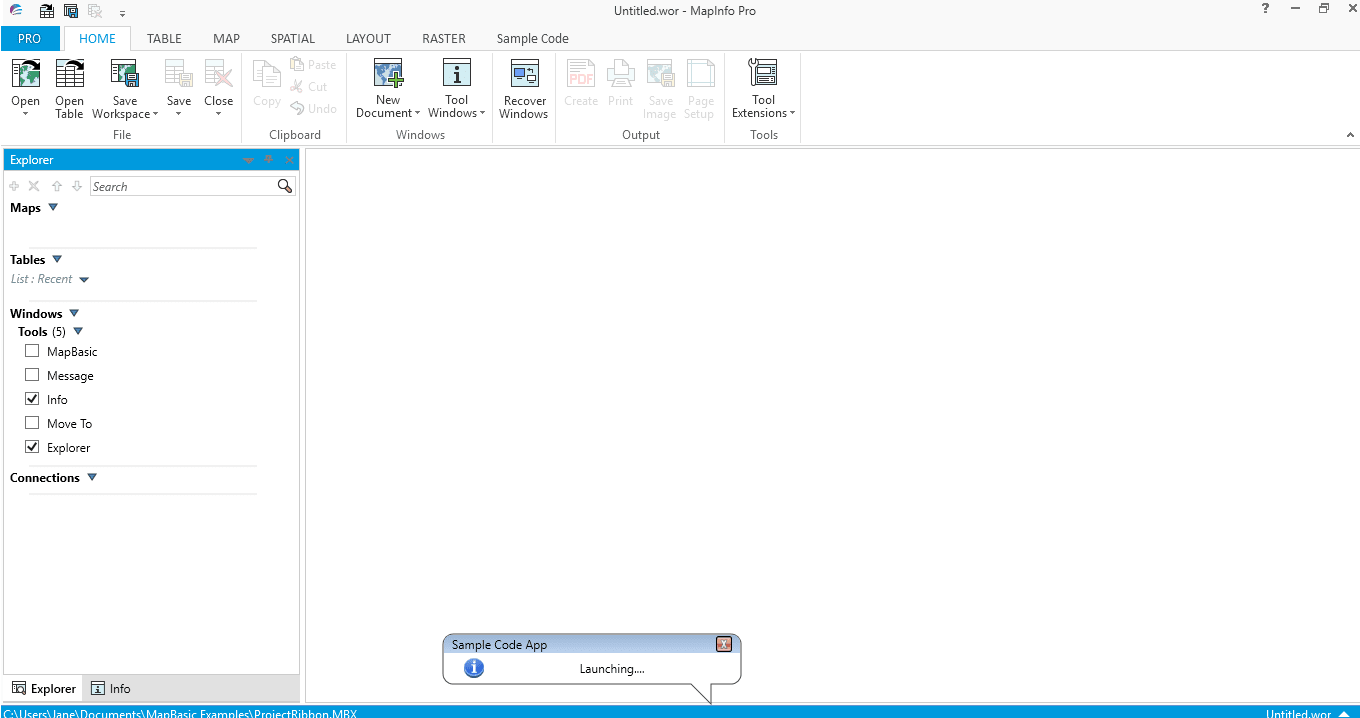
If the code is now compiled and linked when the code is run the following screen shows the launch statement:-
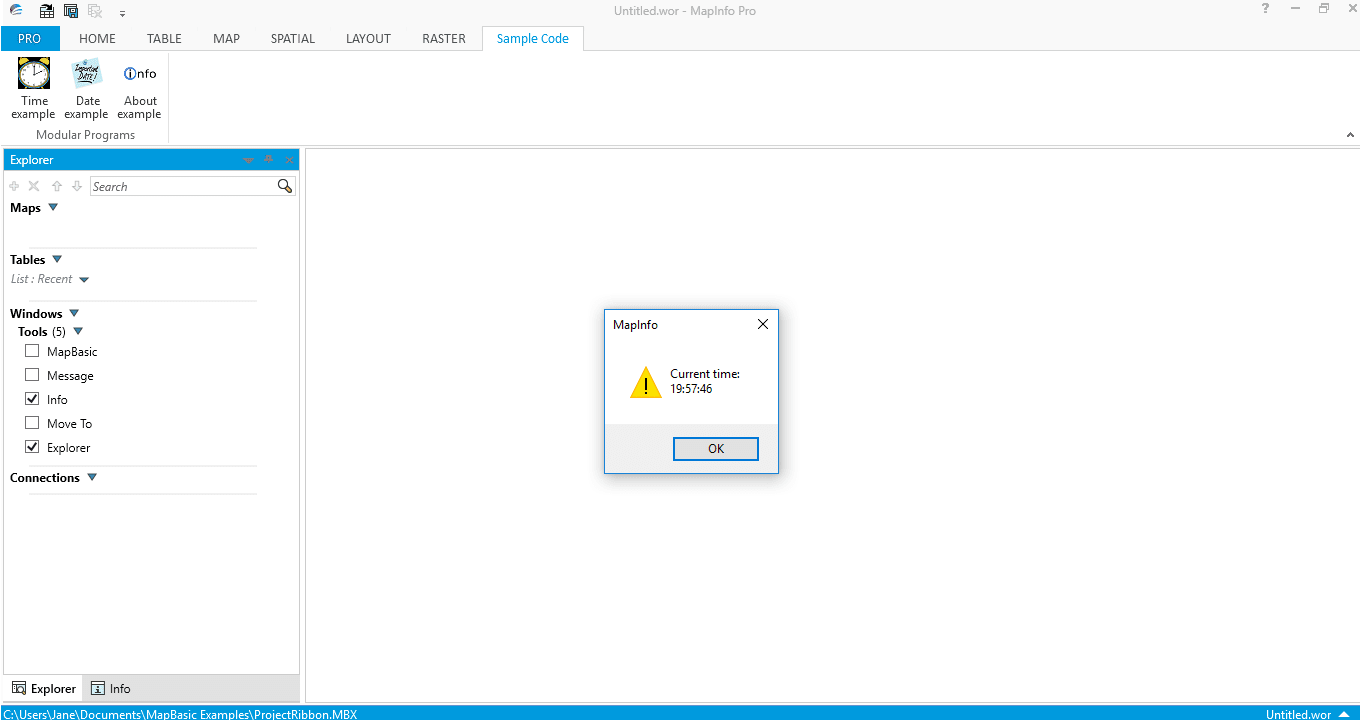
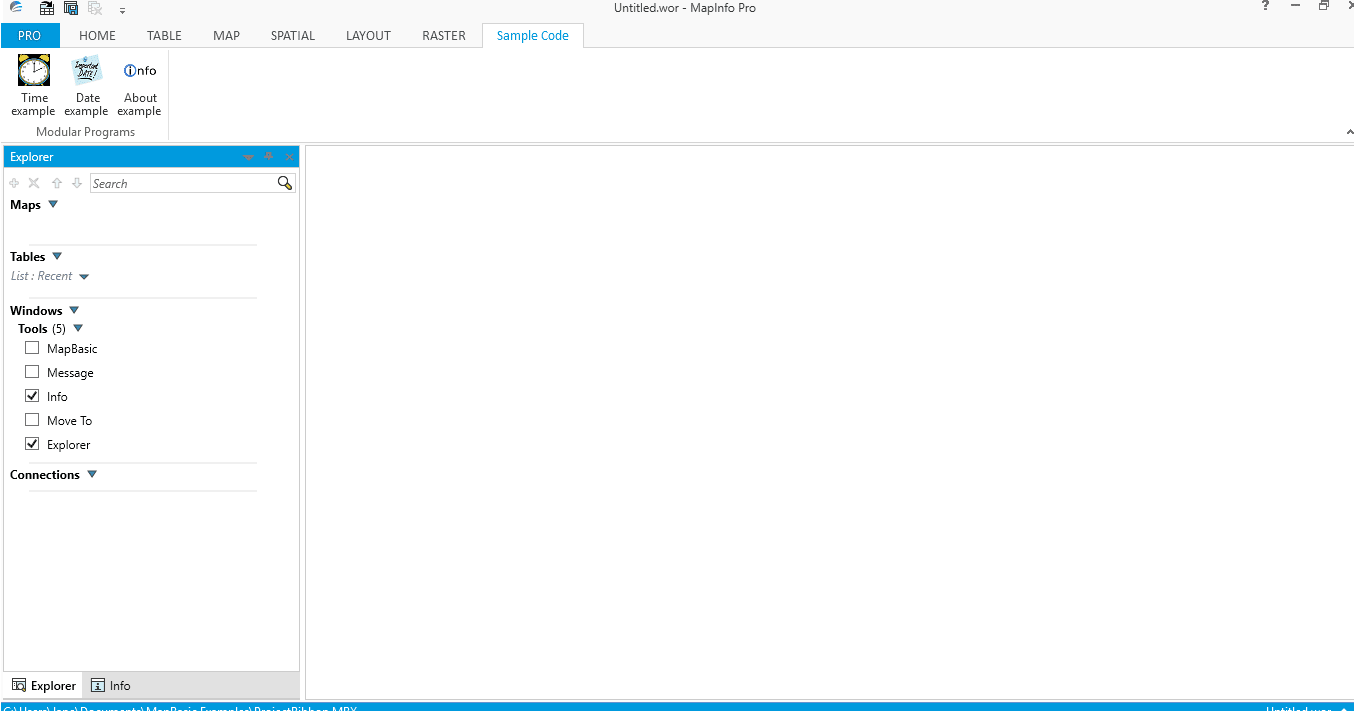
A new tab called Sample Code is loaded which now has three buttons as shown in the next screen:-
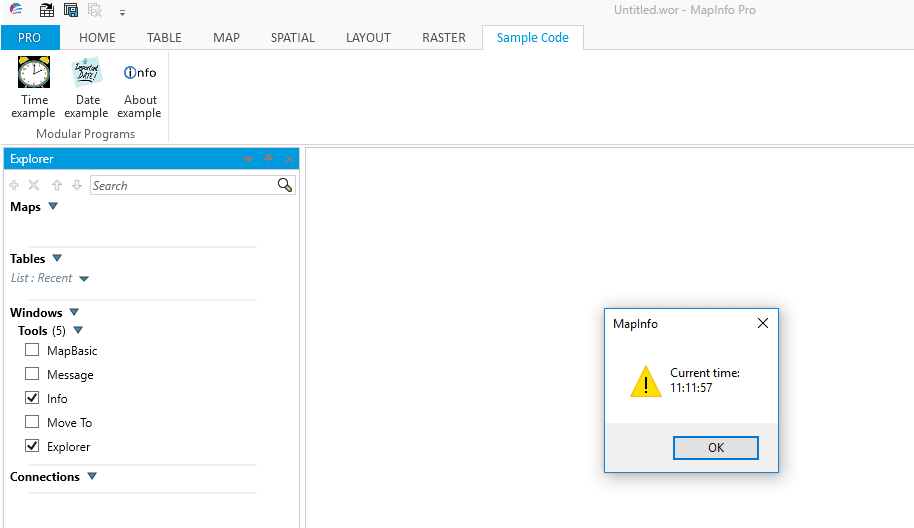
Clicking on the first Time button will produce the current time as shown below:-
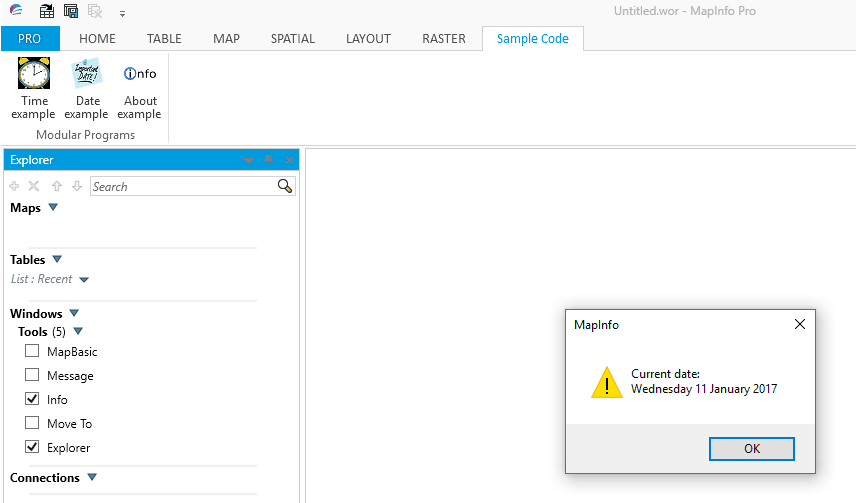
Clicking on the Date button shows the current date as shown below:-
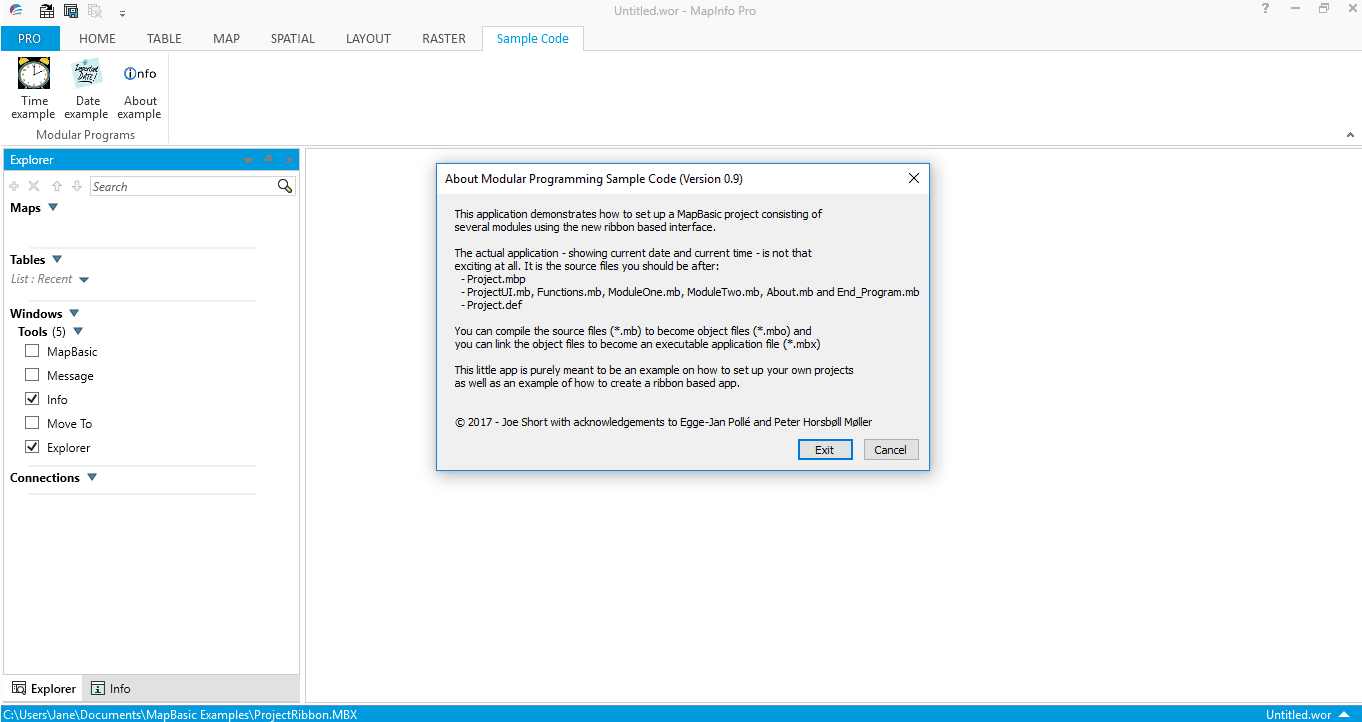
Finally clicking on the about button will show the following dialogue box:-
When the exit button is clicked the option to close the program is given as shown below:-
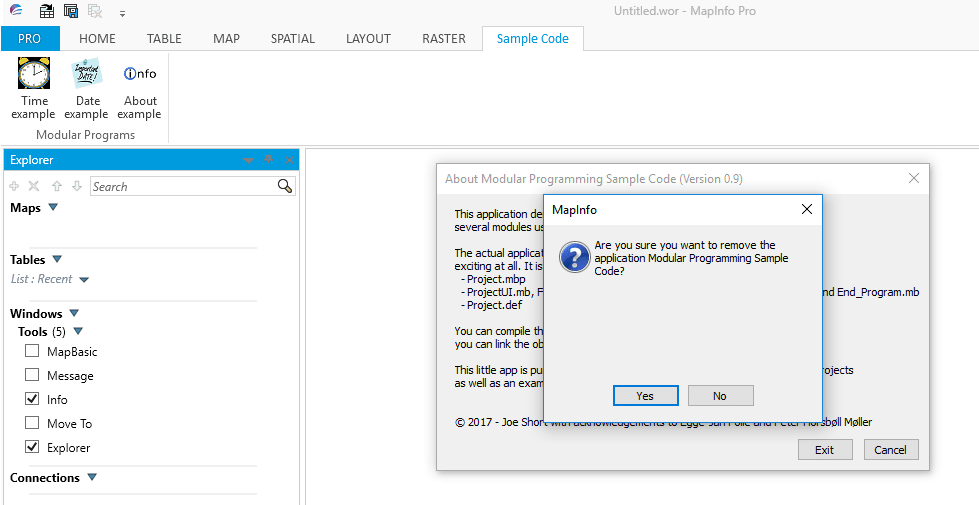
Clicking on the yes button closes the application and removes the added ribbon tab.
In summary in this blog we have taken existing legacy code and revised it so that it could be run as a ribbon based application. The code example requires an understanding of how modular programs work as well as some understanding of how to implement ribbon based applications.
In summary in this blog we have taken existing legacy code and revised it so that it could be run as a ribbon based application. The code example requires an understanding of how modular programs work as well as some understanding of how to implement ribbon based applications.
 RSS Feed